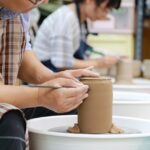
Are you into pottery and wish to learn more about it to get to the next level? Then you may be interested in learning about how to make pottery glaze. If you consider yourself an avid potter and wish to make yourself not only beautiful but functional, then you should learn how to make a pottery glaze.
Pottery has been around for a long time and has become a popular hobby for many. If you must know, this practice provides an outlet for grief, and helps you with self-identification and self-expression, bolstering confidence and self-esteem. Pottery glaze makes your pottery body look professional and cool.
Though it may sound intimidating, pottery glaze offers a number of benefits such as sealing the inherent porosity of unglazed clay. Think of all the things you’ll want to make and even gift them to someone special. As you may imagine there are some steps to follow as well as special tools and equipment, needed to make a pottery glaze. If you are interested, continue reading and learn how to make pottery glaze.
How to Make Pottery Glaze FAQs
Is glaze necessary for pottery?
Glazing is the last phase of the process, and oftentimes one of the most significant. The effect that a glaze can add to a piece can range from dripping to smooth or rough textures. Applying glaze to a piece is not necessary, but it can enhance the fired clay both on aesthetic and functional levels.
How do you make pottery glaze?
In order to make your own ceramic glaze, simply mix a glaze powder with water. It is a relatively simple process. The overall process involves measuring out water, mixing the glaze powder into the water, sieving, adjusting viscosity or density, and letting the glaze sit before it is applied to your bisque ware.
What are the 3 basic ingredients in pottery glaze?
Ceramic glazes consist of three main components: glass formers, fluxes, and refractories.
What are the 5 basic components of glaze?
Pottery glaze is made up of five basic components. These components are silica, alumina, flux, colorants, and modifiers. Even though all glazes are made up of the same components, there is a vast range of colors and types to choose from.
What is used to make pottery glaze?
Raw materials of ceramic glazes generally include silica, which will be the main glass former. Various metal oxides, such as sodium, potassium, and calcium, act as a flux and therefore lower the melting temperature. Alumina, often derived from clay, stiffens the molten glaze to prevent it from running off the piece.
Can you glaze pottery without a kiln?
Do remember that if you don’t have a kiln, you will either have to buy your bisque ware to glaze. Or you will also need to ask the kiln firing service to bisque fire your pottery first. As explained above, and here in this article, most pottery does need to be bisque fired before it’s glazed.
What can I use instead of glaze?
Even big chain stores. It’s easy to use and has a huge variety of colors to choose from. You can mix it with water to lighten the paint or just plop it straight on a palette and start painting.
What are the types of glazes?
Basically, there are four principal kinds of glazes: feldspathic, lead, tin, and salt. (Modern technology has produced new glazes that fall into none of these categories while remaining a type of glass.) Feldspathic, lead, and salt glazes are transparent; tin glaze is an opaque white.
How do you make drip glaze for pottery?
Dripping. This technique involves pouring the liquid along the edges of a pottery piece, brushing the glaze along the edges, or dipping the edge of your Pottery and letting it flow downwards. The glaze will stop flowing at different points throughout the piece.
Can you glaze the bottom of the pottery?
It involves adding a layer of glaze to the surface of your pottery and then fusing them by placing the pottery in a high-temperature kiln. But the bottom of pottery cannot be glazed in the same way, as the hot liquid glaze will fuse to the kiln shelf.
Why make your own pottery glaze?
You can totally glaze your ceramic project with your own made glaze. It dries without baking and you only need a couple of simple ingredients. It is a fun and cheap way to create a clear or colored glossy finish.
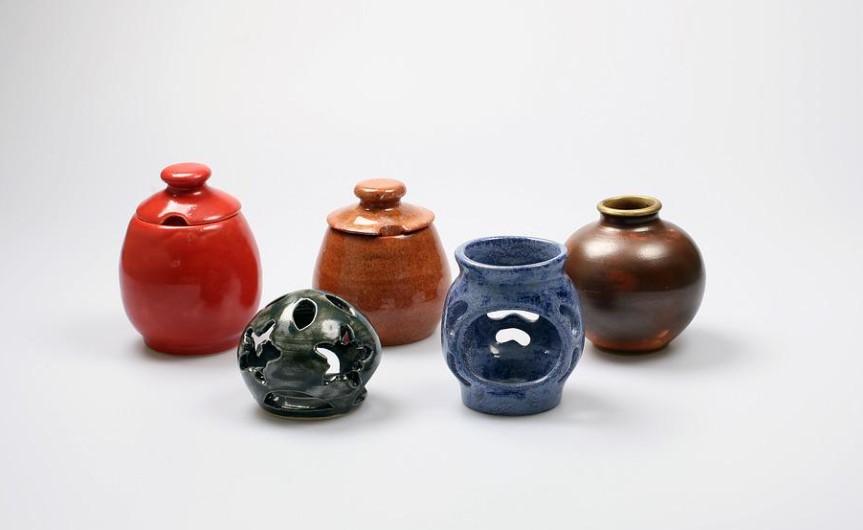
What are the different pottery glaze finishes?
Matte Finish, Transparent, Translucent, Opaque., Underglaze, Overglaze.
What are low fire glazes?
Low-fire glazes have the advantage in depth of color and use less energy to achieve the desired results. Most Potters use low-fire glazes at temperatures between 1828 degrees Fahrenheit (998 C) to 1945 degrees Fahrenheit (1063 C). Glazes like this usually have a bright and vibrant color.
What is a mid-range glaze?
The mid-range or mid-fire glaze is used on porcelain and stoneware clay. Stoneware is the most common mid-fire clay, but you do see it used for porcelain more and more. The mid-fire glaze temperatures range from 2167 degrees Fahrenheit (1186 C) to 2262 degrees Fahrenheit (1239 C).
What if a high-fire glaze?
High-fire glazes use Cone 8 to Cone 10. Many porcelain and stoneware clays use high-fire temperatures and high-fire glazes. Temperatures for high-fire glazes will range from 2280 degrees Fahrenheit (1249 C) to 2345 degrees Fahrenheit (1285 C). Similar to mid-fire glazes, the colors can look more muted and dulled.
What to keep in mind when choosing a pottery glaze?
- Identifying what your pottery will be used for is the first consideration when choosing the correct glaze. Then you’ll choose your glaze finish.
- The most important factor in choosing the right glaze is that the glaze works with your choice of clay. In other words, you need a low-fire glaze with low-fire clay and so on. With any glazes, whether high-fire, mid-fire, or low-fire, you should test them before you use them.
- You might choose a clear glaze when you want to seal the ceramic piece to make it non-porous and food safe.
- You would use Underglazes when you want to create designs and patterns to come up through the glaze.
- Flowing glazes will move as you heat them in the kiln. You have two types of glazes here: flowing or floating glazes and stable glazes, which remain in place.
How to glaze pottery?
Dripping Glaze
This involves holding your glaze with tongs and dipping it for a matter of seconds in a bucket of glaze. If you’re dipping your pottery, you need to paint wax resist on the foot of the pot before you dip. The waxy coat stops the glaze from sticking to the bottom of the pot.
Brushing Glaze
Brushing glaze is just as the name suggests, it is a pottery glaze that is applied to with a brush. They are generally thicker in consistency than dipping glazes. And they contain a gum that stops them from sliding off the pot once applied.
Pouring Glaze
Another way to get an even coat of glaze is to pour the glaze over the pottery surface. This is a good alternative to dipping. If you don’t have large buckets of glaze, you can pour it over the pot. This is a handy way of getting a good coat of glaze onto the inside of vases, especially if they have narrow necks.
Airbrushing glaze
Airbrushing glaze involves spraying a thin mist of glaze onto the pottery. This is a great way to apply an even coat of glaze. It is also good if you want to create a gradient between two glaze colors.
How to Make Pottery Glaze
Materials:
- Clear Glue
- Spoon
- Acrylic paint (optional)
- Clear nail polish
- Cups
- Brush
- Dry ceramic project
Elmer’s Clear Liquid School Glue
This washable glue provides a fun way to bond together materials like paper, wood, fabric, and ceramics. The safe and washable formula is easy for children to use and is easy to clean up.
Featuring a clear formula, it’s ideal for making homemade slime; just add a few common household ingredients and color. Learn how to make slime with glue below.
Fun for the whole classroom and birthday parties, kids can create buckets of slime and assemble arts, crafts, and projects with Elmer’s School Glue.

Features:
- Safe
- Washable
- Nontoxic
Magicfly 30 Colors Acrylic Paint Set
30 Various colors of paints are offered for painting, brushing, stamping, or stenciling on indoor and outdoor projects, adding more colorful details to your daily life.
Encourage your children to express their imaginary world with every splendid painting.
The acrylic paint can be brushed, stamped, or stenciled, working great on canvas, paper, wood, stone, ceramic, model, and more. Perfect for drawing pictures, making DIY Easter eggs, and creating Easter decorations.
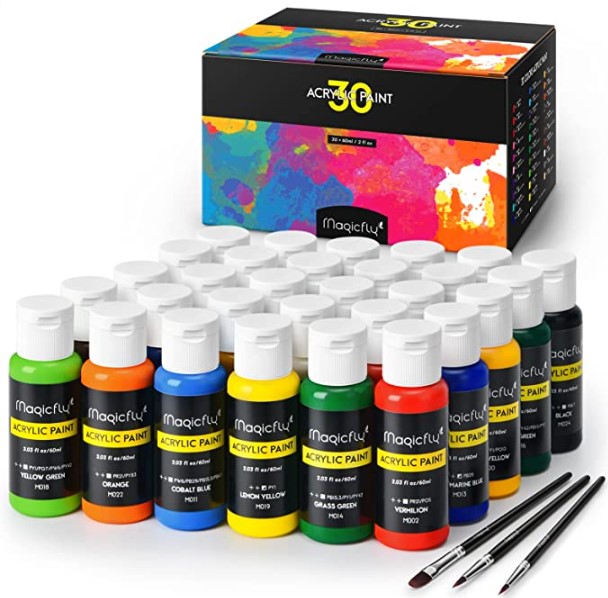
Features:
- Safe
- Non-Toxic
- Vibrant Colors
OPI Nail Polish Top Coats
Seals in the color to prevent scratches and chipping. For a BEAUTIFUL SHINNING FINISH to your OPI manicure apply one coat of nail polish Top Coat, pulling it over the tips of the nails.
OPI Nail Lacquer TOP COAT provides up to 7 days of wear with a protective, high gloss shine non-yellowing formula.
Apply OPI Natural Nail Base Coat, then apply two coats of NAIL POLISH color, finish with OPI Nail Polish Top Coat, then let dry.
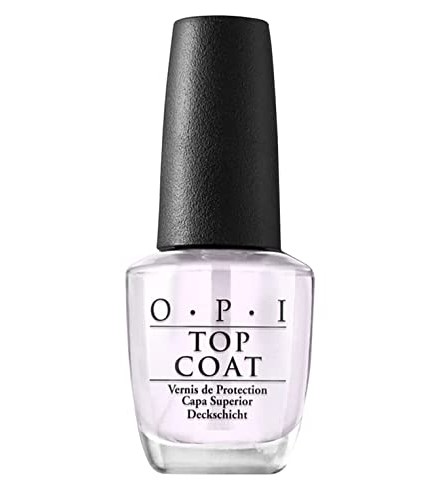
Features:
- Top Coat
- Quick Dry
- High Shine
Process:
- Mix ingredients. Empty the bottle of clear nail polish into the cup. Then add three tablespoons of water and two tablespoons of clear glue and mix it all together until it’s a smooth liquid.
- Apply clear glaze. If you want a clear glossy finish, apply this mixture layer by layer to your dry ceramic project with a brush.
- Apply layer for layer. Before adding another layer, wait until the previous layer is dry. Air-dry clay will absorb the first two or three layers, this is because of the porosity of the clay. Keep adding layers until it leaves a glossy finish.
- Adding color. To add color to the glaze, you can add acrylic paint. Add a little amount of paint and test it on a piece of dry ceramic to determine if you have to add more paint. It depends per color on how much paint you have to add, so be careful with adding too much at once.
- Apply colored glaze. Apply the colored mixture, wait until it’s fully dry, and apply another layer if this is necessary. This glaze can be used for many purposes, but it can’t be used to make your ceramic project food safe.