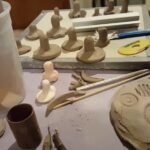
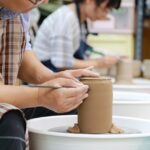
If you love pottery as much as we do, then you’ll want to learn how to build a pottery kiln. If you consider yourself a potter in the making or are perhaps thinking about taking on pottery as a hobby, you should get familiar with the different tools, equipment, and accessories. For that reason, today we’ll be sharing with you how to build a pottery kiln.
If you must know pottery is great for relieving stress it is also a great way for you to make use of your time in a more efficient manner. Like with any new pastime, special equipment is needed to help you achieve your sculpting goals. And so, you may already have heard about pottery kilns, or not. That’s ok.
One way of firing pottery at home is to make your own kiln. A small homemade kiln can be cheap and easy to build, a great solution for homeschooling pottery classes. Although it may seem intimidating, making a kiln is very possible. Continue reading and find out how to build a pottery kiln.
How to Build a Pottery Kiln FAQs
Can you make your own pottery kiln?
If you want to build a kiln for pottery in your backyard, this is one of the simplest. You don’t require any particular equipment, other than a shovel and some combustible material. Pit firing can be used to fire greenware pottery and make it bisque ware.
Can you do pottery without a kiln?
When firing without a kiln, it may help to pre-dry your clay pieces in a kitchen oven set to 190 degrees F. With a kitchen oven, the pots are dried by “baking” below the boiling temperature of water for several hours.
Can you do pottery without a kiln?
When firing without a kiln, it may help to pre-dry your clay pieces in a kitchen oven set to 190 degrees F. With a kitchen oven, the pots are dried by “baking” below the boiling temperature of water for several hours.
Can you fire pottery in an oven?
Do not overfire the clay in the oven, as it may become too hard and brittle. You can paint directly onto the object using acrylic paint once it has cooled but unfortunately the pottery cannot be glazed as the oven cannot reach the temperatures required to hold the glaze in place.
How to Build a Pottery Kiln
There are different ways you can build a kiln at home, below pick your favorite. Keep in mind kilns can be dangerous so safety measures must be taken.
Pit Firing
Pit firing is one of the oldest methods of firing pottery. If you want to build a kiln for pottery in your backyard, this is one of the simplest. You don’t require any particular equipment, other than a shovel and some combustible material.
Pit firing can be used to fire greenware pottery and make it bisque ware. Or, you can bisque fire the pottery first, then wrap the bisque ware in aluminum saggars. The saggars allow you to add lovely decorative finishes to your pots. I will say a little more about this later.
- Dig a hole in your backyard. The size of the pit depends on the size and quantity of pottery that you want to fire. If you have a smallish collection (say 5 or 6 small pots), a pit of around 1 foot is adequate.
- The pit needs to be deep enough to protect the fire from the wind. But not so deep that the fire is starved of oxygen. If there isn’t sufficient airflow the fire in the pit won’t reach high enough temperatures.
- One way of pit firing is to line the pit with sawdust. This is basically kindling. Then place the pots on the kindling, and carefully cover the pots with sticks and wood. You do this as you would build a fire. Starting off with smaller pieces of wood that burn more easily and building up to larger pieces on top.
Brick Kilns
- Another way to build a kiln for pottery in your backyard is to use bricks. There are various different ways to build a kiln for pottery out of bricks.
- Other potters will use brick to build construction above the ground. Although they are building the bricks upward, rather than digging downward, the firing method is similar to pit firing.
- With some brick kilns, you are simply creating a pit into which can put combustible material and pottery. It’s just that the pit is being fashioned out of bricks rather than dug into the ground.
Mud/Clay Kilns
- A clay kiln is made by building a cylinder of mud that is like a thick-walled barrel. A very simple design will have an opening at the bottom of the cylinder where wood is fed into the base.
- More complicated designs involve building a clay tunnel that runs out of this opening. This tunnel protects the fire from wind and makes more room for fuel to be added to the fire.
- The bottom of the kiln becomes a firebox by putting a clay shelf above where the fire burns. Holes are made on the shelf so that the heat, fire, and atmosphere can pass through the kiln. The shelf can also be made out of a metal grid.
Barrel Kilns
Some potters simply fire in a barrel or steel garbage can. They adapt the barrel by drilling a few holes around the base of the can. This allows for airflow.
- A layer of combustible material is placed on the gravel. This can be a combination of wood chips, sawdust, and shredded paper. Pottery is placed on the first layer of burnable material.
- This layer of pottery is then covered over again with more wood. As with the other methods, oxides and salt can be sprinkled in to create flashes of color.
- Once the barrel is loaded, the mixture of wood, paper, and sawdust is set alight. The lid is then placed on the barrel and left to burn.
Raku Kiln
Raku is a way of firing pottery. It involves heating pottery quite quickly to about 1800F (1000C). And taking it from the kiln with long raku tongs when it is still red hot.
- One of the most popular ways is to make a trash can raku kiln. A trash can raku kiln is made from an old cleaned-out oil barrel or galvanized steel trash can. You cut a 4 x 4 inch square at the bottom of the can. This is the hole into which your flame will be directed. Then you cut a 4 x 4-inch hole in the lid of the can.
- The can is then lined with ceramic fiber. Ceramic fiber comes in rolls and can withstand high temperatures. It is fixed to the inside surface of the trash can using ceramic buttons and something called nichrome wire.
- To fire the kiln, you use a propane weed burner which is directed into the burner port at the bottom. The weed burner is attached to a tank of propane gas.
- To use a thermocouple, you will need to have made a hole in the side of the kiln. This hole needs to be about half the way up the side.
- Once you have reached around 1800F, you typically hold the temperature there for about 5 minutes. Then you carefully lift the lid of the kiln. Using the tongs, you remove the pieces and place them in the burnable material.
Wire Mesh Kiln
- Wire mesh kilns come in various different shapes and sizes, but the easiest one to make is a square one.
- As the name suggests, the walls of the kiln are made from wire mesh. These are cut to size and held together using either wire or strong metal clips. The inside surface of each side of the kiln is lined with ceramic fiber.
- Like the raku kiln, a hole is cut into the bottom of one of the panels. This is the hole through which your flame will heat the kiln. The flame is provided by a weed burner torch, linked up to a propane tank.
Electric Kiln
- One way to make an electric kiln is to make a metal frame using strips of angle metal with pre-drilled holes. The frame is then lined with fire bricks. Fire bricks are the insulating bricks used in electric kilns.
- Grooves are cut into the surface of the fire brick and the electric element is pinned into the groove. The grooves run right the way around the kiln so that the elements surround the inner chamber.
- Two holes are drilled in the fire brick, one at the point where the element enters the kiln. The other is drilled at the point where the element leaves the kiln. The elements are then connected up to an electrical supply.
Electric Burnout Oven Kiln
The all-new TableTop Furnace Hi-Temp Burnout Oven offers portability, function, and RapidHeat technology that will heat the kiln within 8 to 10 minutes.
Reaches a maximum working temperature of 2200°F. Comes complete with a digital control panel, a durable and new high-temperature thermocouple, 1500 watts of power, a standard 110V plug, and a wide opening door.
It is ideal for a wide variety of burnout applications, such as crave-able wax, 3D resin, PLA, dental applications, and more! Its new and improved unique design makes sure that flasks cannot damage the interior heating elements.
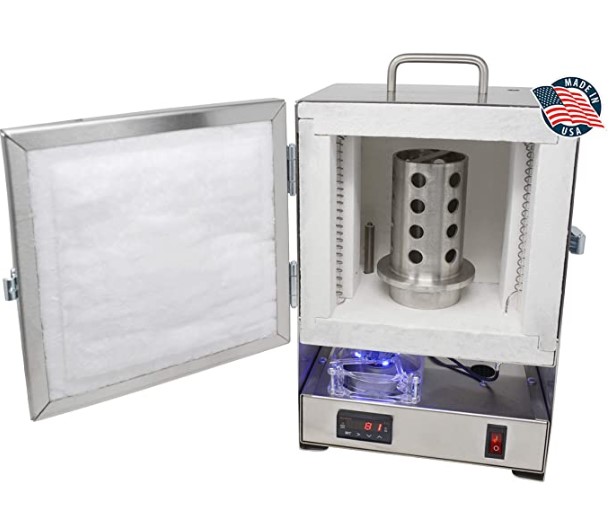
Features:
- Pre-drilled Vent Hole
- Thermocouple
- 2200°F.
Safety Tips
- It’s usually recommended that you build any kind of kiln at least 15 feet away from nearby buildings. But this may vary from region to region.
- You should check out if your local jurisdiction allows you to build a kiln for pottery in your backyard or not. And if so, if they have any particular requirements regarding the location and specification of the kiln.
- Make sure that there is no grass, vegetation, or overhanging trees that could catch alight. And make sure that the ground is even so that your construction is stable.
- Whilst making the main chamber of an electric kiln can be quite simple, you do need some electric know-how. If you don’t know about electricity, you need to involve a registered electrician in your project.